
VMware Skyline – An Adventure with API and PowerBI – Part 3
This is part 3 of this little blog series on my adventure with getting data out of the VMware Skyline API and into PowerBI.
In the first part of this series, we went through the process of gaining access to the VMware Skyline API and testing access.
The second part of this series concentrated on how to gather the data from VMware Skyline directly into PowerBI… but with one drawback, because we had no way to auto generate our access token, we would need to regenerate the access token prior to refreshing our data in PowerBI.
This blog post looks to overcome the drawback experienced in the last part and create a method in PowerBI that will automatically regenerate the access token every time we refresh the report and utilize that refreshed token to gather the latest data.
Part 1 of this series can be found here:
Part 2 of this series can be found here:
GetAccessToken Function
We’re going to create a function in PowerBI that will handle the work of performing the refresh of the access token and then call that function as part of the query created in part 2. The function will be called ‘GetAccessToken’.
Our function is going to start off as a normal query in PowerBI and therefore you should open up the PowerBI file you were working on before and click the ‘Transform Data’ button at the top of the screen to open the Power Query editor.
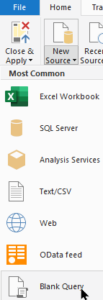
With the power query editor open, you should click the down arrow on the ‘New Source’ entry and then select the ‘Blank Query’ option
You will now see ‘Query1’ listed as a new query. The first thing to do is to right mouse click on this new query and select the option to ‘Rename’. You should rename this query to be: GetAccessToken
Right mouse click on the query again and this time select the ‘Advanced Editor’ option.
We’re going to build up the PowerBI query in a similar way to how we did in the previous part, with the full query provided at the end of this blog post.
token_url
The first part that we will add to the query is the token_url.
Underneath the ‘let’ entry, we will replace the ‘Source = “”‘ text with the following code:
token_url = "https://console.cloud.vmware.com/csp/gateway/am/api/auth/api-tokens/authorize", This code is creating the variable token_url and assigning the web address that will be required to create the access token.
body
The next part of the query is to create the body of the request we are going to send across to generate the token. This is where we will enter our API token that will be used to authorize us against the web address used in token_url, which will then generate the access token. As you may recall, the API token does not change and therefore this can be statically entered in this query. From a security point of view, please remember that the API token can be used to generate an access token and therefore should not be shared with anyone.
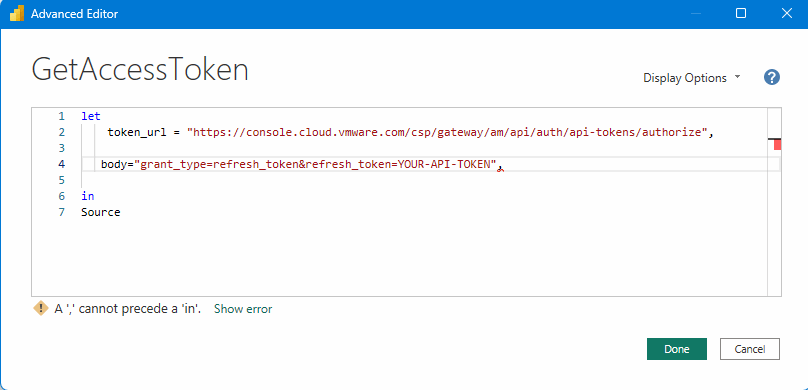
Enter the following code in the ‘Advanced Editor’, remembering to replace the ‘YOUR-API-TOKEN’ entry with the API token you generated in part 1 of this series:
body="grant_type=refresh_token&refresh_token=YOUR-API-TOKEN",So far you should have something similar to below. As mentioned in previous parts, do not worry about the error in the query at the moment, as the query builds up this will correct itself:
Source
Now we come onto creating the Source. This is where we are going to say what type of response we want, we will provide the token_url, some header information and then the all important body including our API token.
We’ll then assign the result of Source (and more importantly the access_token value) to the token variable.
The code that needs to be entered should look like this:
Source  = Json.Document(Web.Contents(token_url,
   [
     Headers = [#"Content-Type"="application/x-www-form-urlencoded",#"Accept"="application/json"],
     Content=Text.ToBinary(body)
   ]
   )
   ),
    token = Source[access_token]
The final element is to change Source after in to read ‘token’. This should mean that your query should be as follows:
let
    token_url = "https://console.cloud.vmware.com/csp/gateway/am/api/auth/api-tokens/authorize",

   body="grant_type=refresh_token&refresh_token=YOUR-API-TOKEN",
Source  = Json.Document(Web.Contents(token_url,
   [
     Headers = [#"Content-Type"="application/x-www-form-urlencoded",#"Accept"="application/json"],
     Content=Text.ToBinary(body)
   ]
   )
   ),
    token = Source[access_token]
in
token
After everything is entered correctly (and you have changed the ‘YOUR-API-TOKEN’ item to your API token value, then when you click ‘Done’, you should see a long series of letters and numbers which is actually your latest access token.
So now we have a process to get an access token into PowerBI and we have a method to use the access token to get data from Skyline into PowerBI… but at the moment, they aren’t working together to allow us to refresh the PowerBI report and have it work seamlessly.
Convert GetAccessToken into a Function
As we want to call the GetAccessToken query from within another query, we want to convert this into a function. With this as a function, we can simply enter the name of the function into our ‘Skyline_Finding_Data’ query and when the query gets to that part, it will initiate the GetAccessToken function. Also, with the GetAccessToken query converted to a function, it will not show as entries in the PowerBI report designer view, meaning that you are less likely to have a field on the report that shows your current access token (which could be a security risk).
The process to convert our GetAccessToken query to a function is simple a case of adding the following to the beginning of that query:
() =>Before you click ‘Done’ the full GetAccessToken function should now look like this:
() =>

let
    token_url = "https://console.cloud.vmware.com/csp/gateway/am/api/auth/api-tokens/authorize",

   body="grant_type=refresh_token&refresh_token=YOUR-API-TOKEN",
Source  = Json.Document(Web.Contents(token_url,
   [
     Headers = [#"Content-Type"="application/x-www-form-urlencoded",#"Accept"="application/json"],
     Content=Text.ToBinary(body)
   ]
   )
   ),
    token = Source[access_token]
in
token
Once you click ‘Done’, the query will be converted to a function. The logo next to the query name will change to a function log and the text will now appear in Italics to indicate that it will no longer be part of the ‘Load’ capability that shows the data fields in the PowerBI designer page. It should look similar to below:
The Final Part of Joining
And now we come to the final part of joining the newly created function to our existing query. This takes our query from utilizing a static access token to utilizing the GetAccessToken function we’ve just been working on.
For this we are going to open our Skyline_Finding_Data query in the ‘Advanced Editor’ and we will modify part of this code.
The line that we are going to edit is the ‘Data’ line. We will remove our static access token information from that line (the item after Bearer) and will replace it with the details of the function we’ve just created. This means that the new Data line should read as follows:
Data= Web.Contents("https://skyline.vmware.com/public/api/data",[Content=Text.ToBinary(body),Headers=[#"Content-Type"="application/json",#"Authorization"="Bearer " & GetAccessToken(),#"accept" = "text/plain"]]),One you click ‘Done’, you should be able to ‘Refresh Preview’ to get an updated table showing the current findings. If you were to wait 5 minutes or so and then refresh again, the access token will be refreshed and the table would be updated based on the data collected using the new access token.
When you now click ‘Close & Apply’ you will have the capability to ‘Refresh’ the whole report without needing to adjust the access token each time.
Now you can get on with designing your report to show the information you want it to show.
For reference, this is the source I used to help with the creation of the access token function: